Friday, December 16, 2016

Using Flow types with React components

Continuing series on Flow, in this blog I'm writing about Flow with React. It details advantages of using Flow while building React components.
Blogger: V. Keerti Kotaru . Author of Angular Material book 

Flow is a natural choice for adding types to a React component. It's primarily because Flow and React are both Facebook's open source projects and community is expected to have better traction in that space. Having said that Typescript is a real contender. It is certainly a viable solution to add types to React components and JavaScript. Will plan to write about Typescript with React in future. To read basic details on Flow, a static type checker for JavaScript check out my earlier blogs,  
1. Idiomatic JavaScript with Flow  
2.Working with Flow on Visual Studio Code 

Type checking is not new to React components. PropTypes are often used for Props' validation. Following are couple of advantages with Flow instead of PropsTypes validation
  • Flow adds type validation for entire JavaScript code. Not just Props on a component. PropTypes validation is specific to Props.
  • Workflow - PropType validation errors are normally seen on console. On the other hand Flow extensions for IDEs show validation errors in-line with the code. It's easy to notice type validation errors.
  • Certain validations are detailed with Flow. For example, a validation that a prop is a function could be done with React.PropTypes.func. But Flow can validate return type and parameter types.

Pre-requisites

Install Flow NPM package. Assuming an NPM package is setup for your code repo, install Flow as a dev dependency on the project.

npm install --save-dev flow-bin

(Or install it globally on the machine)

npm install -g flow-bin

Getting Started with Flow for a React application

If you are using babel transpiler for React, you are all set. A Babel plugin babel-plugin-transform-flow-strip-types would remove types while transpiling. It will be installed along with the package babel-preset-react. React projects using Babel would it include it already.

In the Babel configuration file .babelrc  "presets" configuration and value "react" would run the plugin babel-plugin-transform-flow-strip-types

Code Sample

For simplicity I chose counter component. Checkout code sample at this path.  The counter increments or decrements a value every time you click on a button.

For comparison use this link to review a similar component with PropTypes for validating props.

The sample component expects a prop offset. It has a default value 1. Every time + or - button is clicked, would increment or decrement the value by 1. While invoking the component the offset could be provided as a prop, which will override the default value.

Consider following PropType validations

Counter.propTypes = { 
    offset: React.PropTypes.number 
}; 

// default value provided as below. 
Counter.defaultProps = {
    offset: 1
};

Using Flow types for Props

With Flow we can create a type alias for Props as below,
type CounterProps = { 
 offset: number; 


Specify type for the props variable on the constructor

// declare a class variable props of type CounterProps
props: CounterProps

constructor(props: CounterProps){ 
 super(props); 
 // ... 
}

// declare static variable for default props. 
static defaultProps: CounterProps;

// Now that type system is expecting defaultProps on the class, provide a value.
Counter.defaultProps = {
    offset: 1
};

Functions on props

Consider following code snippet. Every time increment or decrement event occurs, a function callback is provided to containing component. In the sample, containing component prints a string with counter data to console. The callback is invoked/called by Counter component

--------------------- main.js ---------------------------

    // While rendering counter print detailed string with time stamp provided by Counter component and counter value.
    ReactDOM.render(
        <Counter offset={4} eventCallback = {(num: number, eventTime: Date) => 
console.log(`At ${eventTime.toString()} Counter Value is ${num} `)} />
        , document.getElementById('reactApp'));

--------------------- Counter.jsx ---------------------------------------
// Counter props with optional eventCallback function declaration. Notice Maybe type highlighted
 type CounterProps = {
    offset: number;
    eventCallback?: (num: number, eventTime: Date) => void;

};


    // While invoking the callback, as the prop is optional, need to verify it's not null.
    increment(): void{
        this.setState({counterValue: this.state.counterValue + this.props.offset});

        // call provided callback function when increment and decrement events occur.
        // While invoking the callback, as the prop is optional, 
        // need to verify it's not null.
        if(this.props.eventCallback != null){
            this.props.eventCallback(this.state.counterValue, new Date());
        }
    }


The callback is an optional parameter. (Notice the ?). Hence Flow enforces null check before using the function.


References and useful links


Flow for React, official documentation - https://flowtype.org/docs/react.html#_


Tuesday, December 6, 2016

Working with Flow on Visual Studio Code

Blog describes what I believe is an optimal development setup with Flow. It details using Visual Studio Code IDE with Flow.
Blogger: V. Keerti Kotaru . Author of Angular Material book 

Flow is a static type checker. For an introductory blog on Flow's type checking, read my earlier blog.

Optimal way to run type checking with Flow.

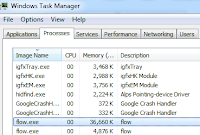
Figure 1: Flow process in the background
Primary option for type checking with Flow is to run flow in a command prompt or terminal. In VS code, you may use the integrated terminal (Ctrl + `). Flow will expect .flowconfig file at the root directory. If you are starting with Flow for the first time, run flow init to create the configuration file.

Flow will start a process (if not running already) and type checks only the JS files annotated with // @flow. Then-on, next time flow command is run, type checking will be incremental and hence it will be better performing. 

However, if you need to type check all files use flow check --all. It will start a new process and type checks all files (irrespective // @flow comment is written or not). As it starts a new process, even the ones not modified after previous type checking are checked again. It is not advisable to run every time with the --all option.

Visual Studio Code.

Ever since Visual Studio Code has been launched I've been using it extensively for JavaScript development. It's light weight & launches fast, got an integrated terminal or command prompt for running, npm, grunt or gulp tasks. It's available on both Windows and Mac machines. It has rich set of extensions for all utility actions. You may prefer to use extensions instead of typing in commands in terminal

For Flow's type checking, I'm currently using "Flow Language Support" published by Flowtype . Follow this link to view and download the extension.

Flow extension points out errors inline with the code. JavaScript files annotated with // @flow comment on top of the page are type checked. Use Problems Window or move the mouse over error to see details on each error. See figure2. Status bar shows error/warning count, click on which brings up the problems window.

Figure 2: VS Code's extension for Flow shows errors with type checking
Note: The above extension starts Flow background process once the window is launched. It incrementally type checks new files.

Skip JavaScript and Typescript syntax checking in VS Code.

In VS Code Flow and the default Typescript or JavaScript syntax checks could conflict. Use the following configuration to disable default checks.

Errors due to conflict with Typescript
"javascript.validate.enable": false,
"typescript.validate.enable": false

Go to Preferences >> Workspace Preferences (or User Preferences) and provide the configuration in settings.json. 

Note: Updating the configuration in Workspace preferences would skip JS and Typescript checking in only the current project. Updating it in User Settings will skip for all projects.

The workspace settings could be checked-in to git or any other source control. The settings are saved in settings.json under .vscode folder at the root directory. This will allow all developers on the project obtain settings by default. We don't have to do it on each machine explicitly.

References and useful links.

VS Code extension for Flow - https://marketplace.visualstudio.com/items?itemName=flowtype.flow-for-vscode
Documentation on starting a new Flow project - https://flowtype.org/docs/new-project.html#_

Thursday, December 1, 2016

Idiomatic JavaScript with Flow

This blog describes Flow, a static type checker for JavaScript. It provides getting started details and basic concepts of type checking using Flow.
Blogger: V. Keerti Kotaru . Author of Angular Material book 

What is Flow?

Flow is a static type checker for JavaScript. It is an open source project by Facebook (GitHub link). It enables specifying types for variables and objects in JavaScript.

Flow type checking could be run on a console. Easier option is to use plug-ins or extensions with IDEs. I use Visual Studio Code for JavaScript development. I find Flow Language Support extension by Flowtype publisher pretty useful. Follow the link to view and install it.

How does it work?

Specifying types for JavaScript variables and objects could be useful as they point out common code errors that could result in bugs. However, browsers do not understand flow syntax and type annotations. Flow types need to be stripped off before running on the browser. And hence Flow is a static type checker, rather than a language.

Setup Flow

Assuming an NPM package is setup for the sample code repo, install Flow using as a dev dependency on the project.

npm install --save-dev flow-bin 

We may use Babel plug-in to strip off types. But for simplicity, in this getting started blog, I'm using flow-remove-types NPM package.

Install flow-remove-types package globally on your machine.

npm install -g flow-remove-types

The code sample described in the blog is launched to Index.html. Sample also has a JavaScript file with type syntax, named index.js. As described above, once we add Flow types to the code, browser can't understand Flow syntax. Hence we will generate JavaScript file without Flow types for browsers to run. In the sample I named it bundle.js. It is generated using the flow-remove-types script. Add reference to bundle.js in Index.html

Run the following command to strip types.
flow-remove-types index.js --out-file bundle.js

Refer to complete code at this link

JavaScript Idioms

Flow claims to work well with JavaScript style of coding and idioms. I attempted the following basic samples.

In the index.js to start type checking add the following comment  on top of the file.
// @flow

Consider following function

// @flow

((number1, number2) => number1 * number2)(10,20)

The function takes two parameters number1 and number2. In the above statement we are calling the function with values 10 and 20. Here flow is inferring a type number to the parameters as we are calling the function with numeric values. Consider following code erroneously providing string on the first parameter. 

// notice first parameter is a string.
((number1, number2) => number1 * number2)('Im String',20)


Flow points out the error on variable number1, string (The operand of an arithmetic operation must be a number.).


In the above example, we haven't started using types yet. Just by adding the // @flow comment on top of the file, type checking can begin and certain problems are alerted. However, the error is shown on the statement multiplying numbers for an incorrect parameter value. Flow implied string variable because the function was called with a string. It showed the error as it finds multiplication applied on string. 

Add types

Adding types makes the developer intent clear. We can declare a variable with syntax variableName: type syntax. Consider following sample

let isItCool:boolean; 
isItCool = true;

We declared a boolean and assigned true. Assigning a non boolean will show the type error.

isItCool = "test string";
string (This type is incompatible with boolean)

Now, let's rewrite the above multiplication function with types in paramters

((number1: number, number2: number) => number1 * number2)('Im String',20)

Now the error is specific, string (This type is incompatible with number)


Let us now consider specifying return type. Here I modified multiplication to addition, a string parameter will result in concatenating two values. Consider following code,

((number1, number2) => number1 + number2)('10',20)
// It will result in 1020

This depicts why explicit typing is important to avoid bugs. Consider specifying return type on the function. Following is the modified function. Notice the highlighted part for return type.

((number1, number2):number => number1 + number2)('10',20)

Specifying return type results in error depicting resultant string is incompatible with numeric type.

string (This type is incompatible with the expected return type of number

However specifying input parameters' type will point out error with string input parameter for number type in the first place.

References and more reading material

Complete Sample - https://github.com/kvkirthy/VenCKI-Samples/tree/master/Flow-basic-sample
Read getting started guide here, https://flowtype.org/docs/getting-started.html
Visual Studio Code plug-in for Flow https://marketplace.visualstudio.com/items?itemName=flowtype.flow-for-vscode

Saturday, October 8, 2016

Getting started with AngularFire 2

The blog describes using AngularFire2, Angular 2 and TypeScript API for Firebase. It is a beginner guide with a sample for retrieval and update to Firebase database.
Blogger: V. Keerti Kotaru . Author of Angular Material book . Twitter @KeertiKotaru . linkedin.com/in/keertikotaru

Firebase started as a cloud database that can store and retrieve JSON objects. It provided an effective database solution for mobile apps and other applications. Today if you look at the newer version of Firebase, database is only a part of it. It has great analytics features, push notifications to mobile & Chrome and Firebase Cloud Messaging (FCM).

Realtime Database

Firebase database has a unique feature to synchronize database and clients systems automatically. In case of Web UI, it uses a Web Socket connection to push changes to the client. As and when there is a change to the JSON data on the cloud DB, it is pushed to all connected clients.

Sample - Bus Schedule Management: For the blog, I built a couple of pages that deal with bus schedule management. A page to list buses and schedule. And another page to update if there is delay in the arrival time for a bus. 

Consider figure 1. The window on the left shows list of buses to the passengers. The window on the right could be used by admins to update if there is a delay in arrival. The sample is using AngularFire2 (Firebase API for Angular2 & Typescript) to connect with the Firebase database. As and when there is a change to ETA (Expected Time of Arrival), it's instantly synchronized with all clients.

Checkout complete code sample here..


Figure 1: Real time updates
Figure 2: A Sample Firebase App
Left Nav with feature List.

This blog uses AngularFire 2 & Typescript for the Firebase API. Firebase integrates with multiple platforms including Android, iOS and Web. While the Web JavaScript API is for plain JS that could be use in any HTML/JS app, the AngularFire is AngularJS specific API.

AngularFire 2 is in beta at the time of writing this blog. It uses Angular 2. And code in this blog uses TypeScript along with Angular.

Getting Started - Create an app on Firebase console

  • Log into firebase at firebase.google.com. Sign-up if you don't have an account already.
  • Once logged-in,  click on "Go to console".
  • It lists an existing Firebase apps. If it's a new account create an app. 
  • Click on the app to see various features provided by Firebase.

Create Angular 2 Project

Angular CLI is preferred tool for scaffolding an Angular 2 application. Create a new Angular2 app using the following command. It will also install the dependencies.


ng new angular-fire-2-sample

Note: If you do not have Angular CLI already installed, follow the link to get instructions on installing the tool. 


Add angularfire2 and firebase package references


To use AngularFire2 and firebase API in the project, install the package using the following command.


npm install firebase angularfire2 --save
(--save will update to package.json for future installation of required dependencies)


Add AngularFire2 app to Angular Module

In the scaffolded project the main module is in the file  src/app/app.module.ts
Edit this file to import AngularFireModule from angulafire2
import {AngularFireModule} from 'angularfire2';


Create configuration object. 

// API documentation suggests to export the configuration
export const config = { 
 apiKey: "[API Key]", 
 authDomain: "gdg-bustracker.firebaseapp.com", 
 databaseURL: "https://gdg-bustracker.firebaseio.com", 
 storageBucket: "" 
};

Follow below steps to create the configuration object readymade.
  1. Click on settings icon next to the app in Firebase Console.
  2. Click on "Add Firebase to you Web App" link. It presents the configuration object.
  3. Copy the configuration to the AngularFire app.
Figure 3: Two easy steps to get to Firebase configuration to be added to the Web App
Add reference to the module in the module imports. Consider following code,
@NgModule({ 
 declarations: [ AppComponent ], 
 imports: [ 
       BrowserModule, 
       FormsModule, 
       HttpModule, 
       AngularFireModule.initializeApp(config) // initializes and import Firebase module     ], 
 providers: [], 
 bootstrap: [AppComponent] 
})

Note: There is an open bug, that could result in build errors with firebase package. Add the following line in src/main.ts to circument the problem temporarily.

import * as firebase from 'firebase';

Now Firebase API is ready to use.

Create a service to integrate with Firebase

It is a good idea to keep the bus data access in a separate service. It could be injected in components while dealing with bus data.

Create the service using Angular CLI with the following command.

ng g service bus-data-access

The generated class is named BusDataAccessService. Provide the service in the main module (app.module.ts). Consider following code snippet,
// import the service module 
import { BusDataAccessService } from './shared/bus-data-access.service'; 

// add it to providers list in the module. Note that the @NgModule decorator is stripped off additional details for readability. Look at the file in github for complete code. @NgModule({ 
 declarations: [ ], 
 imports: [ AngularFireModule.initializeApp(config) ], 
 providers: [ BusDataAccessService], // *** the service is provided here (to the module)
 bootstrap: [AppComponent] }) 
export class AppModule { }

Import the following in the newly created bus-data-access.service.ts file,
import { AngularFire, FirebaseListObservable } from 'angularfire2';
  • AngularFire - provides API for various firebase services. In the BusDataAccessService, we use it to interact with database.
  • FirebaseListObservable - An RxJS observable. The BusDataAccessService returns the observable (list of buses) which could used in the template. Please note, the bindings in the template are asynchronous with observables.

Retrieve the bus list

Consider following code in the BusDataAccessService for retrieving bus list.
// Class property for bus list 
 buses: FirebaseListObservable; 

 // inject AngularFire service 
 constructor(firebase: AngularFire) { 
   // get bus list from schedule node on the Firebase DB. 
   this.buses = firebase.database.list("/schedule"); 
}

We are retrieving bus list from a node named schedule in the JSON stored on Firebase DB. Here is the structure of bus object I have. The FirebaseListObservable object yields a list of these objects.
"A2F001": { 
   "from": "Hyderabad", 
   "to": "Bengaluru", 
   "expectedTimeOfArrival": "10/02/2016 10:00", 
   "scheduledTimeOfArrival": "10/02/2016 10:00", 
   "delay": 0, 
   "delayReason": "N/A" 
 }

A function getBusList on BusDataAccessService returns the observable.
getBusList(){ 
  return this.buses; 
}


Update changes to Bus Schedule

We use another function in BusDataAccessService for updates to the bus schedule. Consider following code.
  saveBusData(id, expectedTimeOfArrival, delay, delayReason){
    this.buses.update(id, {
      expectedTimeOfArrival:expectedTimeOfArrival,
      delay:delay,
      delayReason: delayReason
    })
  }

In the given application I anticipate changes to three properties, expected time of arrival, delay in minutes and delay reason. The save function expects these as parameters.

We also need to know which bus schedule is being updated. The first parameter, id should have the unique identifier for the bus JSON object.

The update API (in AngularFire) expects field being updated as a key and the new value as the value. We are using ES2015 syntaxes. When the key and value variable names are the same (on the JSON object), we don't have to write them twice. Will cleanup this payload as the following.


  saveBusData(id, expectedTimeOfArrival, delay, delayReason){
    this.buses.update(id, {
      expectedTimeOfArrival,
      delay,
      delayReason
    })
  }


Integrate the BusDataAccessService with the components

Component shows the bus data on the screen. Component calls the above written getBusList() of BusDataAccessService.

As a first step, import the service in bus-list.component.ts
import { BusDataAccessService } from '../shared/bus-data-access.service';

In the constructor inject the service and call getBusList function. The returned data is assigned to a field buses on the class.
  constructor(dataService: BusDataAccessService){
    this.buses = dataService.getBusList();
  }

In the template iterate through buses asynchronously. Refer to async filter on the *ngFor. Note that the field buses is an observer. Unlike an array, whole list is not available in an observer upfront. Each record is asynchronously obtained.

Consider following template snippet from bus-list.component.html 
<div *ngFor="let item of schedule | async">
        <h3 class="panel-title">{{item.from}} to {{item.to}}</h3>
        <!-- other similar bindings go here. Refer to file in github for complete template. -->
</div>


Make updates to bus data

 In the sample repo, another component admin has controls to update delay information. Refer to figure 1, which let's user add delay in minutes and reason for the delay. The admin component has similar template to that of bus list, with additional controls to increment/decrement minutes and a text area to input reason for the delay.

As user updates delay information and clicks on the save button, following handler is called in the component class. It in-turn calls the saveBusData function in BusDataAccessService, which is using the Firebase API to update the database.
   save(item){
    this.busDataAccess.saveBusData(item.$key,
      item.expectedTimeOfArrival,
      item.delay,
      item.delayReason
    );
   }

Template for the button in admin component
<button class="btn btn-info" (click)="save(item)">Save</button>

References and further reading

AngularFire 2 Github
Follow this link for complete code sample
Firebase Docs

Thursday, September 15, 2016

Working with Grid List in Angular Material


This blog describes using Angular Material's Grid List to show an array of data. We use Angular Material directives/elements/attributes for rendering the content.


Angular Material’s Grid List provides a different perspective to the regular list control. Each item in the grid list are laid out as tiles. It provides additional space and an elaborate view. More than anything, it is fun to play with the layout compared to regular list.

For the blog I’m using dinosaur data represented with a grid list. Special thanks Firebase sample dataset that provide readymade JSON objects. (Not using firebase for this sample. Just used the sample dataset). Refer to references section at the end for a link to the dataset.

Getting Started 

 Use md-grid-list and md-grid-tile directive to create a Grid List. Consider following code for md-grid-list.

  • Use md-cols attribute for configuring number of columns on the grid list. 
  • Use md-row-height attribute to set height of each row (and hence the tile). 
<md-grid-list md-cols="4" md-row-height="200px">…</md-grid-list>

Each tile on the grid list is represented by md-grid-tile directive. Use ng-repeat to iterate through array of dinosaur data. 
<md-grid-tile ng-repeat="item in dinosaurs" > ... </md-grid-tile>

Within md-grid-tile, use elements/directives md-grid-tile-header and md-grid-tile-footer elements to add header and footer to each tile. Blog's sample is using a footer. Consider the following code. It shows two elements on the footer for a dinosaur, name and the order.

<md-grid-tile-footer >
          <strong>{{item.name}}</strong>
          <div>{{item.order}}</div>
  </md-grid-tile-footer>

Responsive Attributes

A four column grid looks good on a desktop screen. How about a mobile or tablet screen? The tiles might squeeze and the content might not be legible. Use Angular Material attributes that take advantage of CSS3 Flexbox break points for rendering according to the screen size. Consider following sample.

   <md-grid-list md-cols-gt-sm="4" md-cols-sm="2" md-cols="1" md-row-height="200px">

Use md-cols-sm with a value 2.  It shows grid list with two columns on a small screen. The CSS Flexbox (used underneath by Angular Material) considers screen width between 600px and 960px as a small screen.

Use md-cols-gt-sm with a value 4. It shows grid list with four columns on a screen greater than large. That is medium, large and extra large screens. Anything with screen width greater than 960px is considered greater than small.

That leaves an extra small screen (screen width less than 600px). Use md-cols default value to 1. It shows a grid list with one column on an extra small screen.


Make specific tiles larger

Based on a specific criteria, one or more
tiles could be made larger than others. Consider following sample. It makes the first tile span over two rows. $index represents index of an item in the loop with ng-repeat. If it’s 0, set rowspan  value to 2. Otherwise stick to default value 1.

<md-grid-tile md-rowspan-gt-xs="{{($index===0)?2:1}}" ng-class="item.background" ng-click="null" ng-repeat="item in dinosaurs">

It is a simplistic example. But consider using the rowspan based on tile's content length. For tiles with larger content or images, increase the rowspan.

Also, notice -gt-xs break point has been used on md-rowspan. As detailed out already, on an extra small screen, grid list shows a single column. With nothing next to it in a row, we can set it to default height on an extra small screen.

Complete Sample


References:

Angular Material website (https://material.angularjs.org) for

  • Grid List details.
  • Responsive break points.

Firebase dinosaurs sample dataset- https://dinosaur-facts.firebaseio.com/dinosaurs

Saturday, August 20, 2016

Implementing Google Inbox styled FAB buttons using Angular Material


This blog describes Floating Action Buttons and its implementation using Angular Material

What is a FAB (Floating Action Button) control?

Google's Material Design uses a FAB control to promote an action. These are floating buttons, not tied to a container or a control like a menu bar, a nav bar or a side menu. These highlight one more frequently used actions on the page.
As an example, Google Inbox has a button on the right-bottom, which pulls-up frequent actions like compose email, create a reminder etc.

Angular Material

Angular Material is a library for developing Material Design styled applications using AngularJS. In this blog let's explore creating a FAB control using Angular Material.

Create a button

Let's start by creating a simple button and styling it as a FAB. To create an Angular Material button use the directive md-button. Apply following CSS classes
md-fab - provides FAB look and feel to the button.
md-fab-top-right / md-fab-top-left / md-fab-bottom-right / md-fab-bottom-left - Position the button on top right or top left or bottom right or bottom left
Consider following code sample,


<md-button aria-label="An Idea" class="md-fab md-fab-top-right" ng-click="null">      <md-icon md-svg-src="images/ic_lightbulb_outline_white_48px.svg"></md-icon> 
</md-button>


Figure-1: A FAB control on top right of a page.

Notice md-icon element with-in the md-button. A FAB button looks better with an icon describing it's purpose instead of a text title. Refer to figure-1 for the result.


FAB Speed dial

Figure 2 - Speed dial


Google Inbox example described earlier is a Speed Dial. The FAB expands to a series of options. In the sample, let's create a speed dial of settings.  Clicking on the settings buttons shows available settings. Refer to figure 2. It shows settings speed dial trigger. Clicking or hovering over the trigger expands to show available settings.


Consider following code sample,


<md-fab-speed-dial md-open="isOpen" md-direction="up" class="md-fling md-fab-bottom-right md-hover-full" ng-mouseenter="isOpen=true"
            ng-mouseleave="isOpen=false">

...
</md-fab-speed-dial>


Similar to previous example, the CSS class md-fab-bottom-right positions the button on bottom right of the container. In the code sample md-content (directive for workspace in Angular Material) is the container.

Use md-fab-speed-dial directive, which encapsulate all the elements of speed dial.

The md-open attribute takes an expression. We are using a variable on model isOpen. If the value is set to true by default, will show FAB expanded on load.

In the sample, it's set to true by an expression on hovering over the speed dial. Notice the expression for ng-mouseenter sets isOpen to true. Similarly, on moving the mouse pointer out of the speed dial area closes the dial with isOpen set to false by ng-mouseleave

The md-direction accepts up/down/left/right to set the direction the dial expands. For a button on bottom right expanding the dial up is natural.

A CSS class md-fling sets animation while speed dial options show. md-scale is the other animation option available.

Use md-fab-trigger child element (within md-fab-speed-dial) for speed dial's trigger button. Consider following code,

           
 <md-fab-trigger>
     <md-button class="md-fab" aria-label="Settings">
         <md-icon md-svg-src="/images/ic_settings.svg"></md-icon>
     </md-button>
 </md-fab-trigger>


A fab button has been created as the trigger, which expands to show available speed dial options.

Encapsulate speed dial options under md-fab-actions. Each option is another FAB.  

You may consider using md-mini CSS class on child buttons under md-fab-actions. It shows the options as a smaller button than the trigger, indicating a child element. 

Also consider using md-tooltip directive to show tooltip help text for each option on the speed dial.

Consider following code,

 <md-fab-actions>
    <md-button class="md-fab md-primary md-mini" aria-label="Bluetooth Settings">
          <!-- Each component provides descriptive text as tooltip
          Direction tooltip should appear is et by md-direction attribute.
                     -->
         <md-tooltip md-direction="left">Bluetooth</md-tooltip>
         <md-icon md-svg-src="/images/ic_settings_bluetooth.svg"></md-icon>
     </md-button>
     
     <md-button class="md-fab md-primary md-mini" aria-label="Brightness Settings">
           <md-tooltip md-direction="left">Brightness</md-tooltip>
           <md-icon md-svg-src="/images/ic_settings_brightness.svg"></md-icon>
     </md-button>
     
     ...
</md-fab-actions>


Consider consolidated FAB Speed dial code below. Follow this link to Github for complete sample.

        <md-fab-speed-dial md-open="isOpen" md-direction="up" class="md-fling md-fab-bottom-right md-hover-full" ng-mouseenter="isOpen=true"
            ng-mouseleave="isOpen=false">
            <!-- Trigger button for speed dial. Notice it's a FAB button
                ARIA Label - FAB Buttons don't have title for the screen readers to pick
                For accessibility reasons we need ARIA label set. 
                Otherwise it might result in warnings
            -->
            <md-fab-trigger>
                <md-button class="md-fab" aria-label="Settings">
                    <md-icon md-svg-src="/images/ic_settings.svg"></md-icon>
                </md-button>
            </md-fab-trigger>

            <!--  Individual FAB options in the speed dial 
                  Notice these are fab buttons. 
                  md-mini is applied to make it a smaller sized FAB control
            -->
            <md-fab-actions>
                <md-button class="md-fab md-primary md-mini" aria-label="Bluetooth Settings">
                    <!-- Each component provides descriptive text as tooltip
                        Direction tooltip should appear is et by md-direction attribute.
                     -->
                    <md-tooltip md-direction="left">Bluetooth</md-tooltip>
                    <md-icon md-svg-src="/images/ic_settings_bluetooth.svg"></md-icon>
                </md-button>
                <md-button class="md-fab md-primary md-mini" aria-label="Brightness Settings">
                    <md-tooltip md-direction="left">Brightness</md-tooltip>
                    <md-icon md-svg-src="/images/ic_settings_brightness.svg"></md-icon>
                </md-button>
                <md-button class="md-fab md-primary md-mini" aria-label="Display Settings">
                    <md-tooltip md-direction="left">Display Overscan</md-tooltip>
                    <md-icon md-svg-src="/images/ic_settings_overscan.svg"></md-icon>
                </md-button>
                <md-button class="md-fab md-primary md-mini" aria-label="Voice Settings">
                    <md-tooltip md-direction="left">Voice</md-tooltip>
                    <md-icon md-svg-src="/images/ic_settings_voice.svg"></md-icon>
                </md-button>
            </md-fab-actions>
        </md-fab-speed-dial>

References and useful links

Wednesday, June 29, 2016

Typeahead search with Angular2 and TypeScript


This blog describes typeahead search implementation using Angular 2 and TypeScript. The functionality allows user to start typing in a form field and provides list of recommendations with the given text. See my previous blogs for Angular 1.x implementation and Introduction to RxJS in Angular 2


Type ahead search: 

Off late, one of the common feature in forms (on a web page) is type ahead search. It is generally tied to text fields and drop-downs. The functionality allows user to start typing in a form field and it provides list of recommendations with the given text.

The implementation is relatively simple for fields like country list or states list. We can download the complete list in the browser and filter through while user is typing. However, if it is a stock ticker, we might need to retrieve data dynamically from a server API. Here, efficiently managing the server calls is critical.


Reactive Extensions - JavaScript : 

RxJS (Reactive Extensions JavaScript) and observables are quite effective with requirements like typeahead search.

RxJS is nothing but,
  1. Observables -  asynchronously process stream of data. The source of the stream could be network resources (Server APIs) or UI controls. Observable emits items in a stream and an observer processes them.
  2. Operators - that act on emitted sequence of items. Examples: 
      1. map() for transforming results
      2. take(n) for selecting first n items from an observable
  3. Scheduler - for scheduling and decision making on when to emit an item in an observable.

My previous two blogs(1 & 2) discussed RxJS and Observables. Type ahead search is even a better example for the following reasons and complexity
  • A continuous stream of events are emitted from the UI - user types characters in the text field resulting in new information each key press.
  • Potentially each key press can result in server side API call to retrieve new information. Handle results from the API calls asynchronously. 


Implementation: 

Consider following component code,

 @Component({
    selector: 'typeahead-search',
    templateUrl: 'app/templates/search.tpl.html'
 })
 export class AppComponent
 {
    searchForm: any;
    results: Observable<any>;  
 
    constructor(private fb: FormBuilder, private http: Http){
        this.searchForm = this.fb.group({
            'searchField': [''] // we can set default value - it is set to be an empty string here.
        });

        // reference the control (ngControl)
        var ctrl = this.searchForm.controls.searchField;


        this.results = ctrl.valueChanges
                    .switchMap(fieldValue => this.http.get(`http://localhost:3001/api/search?term=${fieldValue}`))
                    .map(res => res.json());

 }


We are creating an element/component named typeahead-search. We have a single text field in the form. Form Builder API helps create Control Group, set up validations etc. For simplicity, we are not adding any validations for the typeahead text field in the sample.

Consider following line of code. This line is at the heart of type ahead search. That's all it takes to implement typeahead search in Angular 2. 

        
this.results = ctrl.valueChanges
                    .switchMap(fieldValue =>          this.http.get(`http://localhost:3001/api/search?term=${fieldValue}`))
                    .map(res => res.json());

  • On the control (text field) valueChanges is an observable<any>. It emits new text as user is typing. It emits new text.
  • On the observable, the switchMap() operator accepts each value emitted and passes it on to the callback. The emitted values are latest search string on the control. The callback function makes an HTTP call using http.get API. 
  • The returned object is transformed to desired result using another RxJS operator map

Debounce: debounceTime(timeInMilliseconds)

It is another useful RxJS operator. It restricts emitting items from an observable only after the given timespan. It drops events till the given time and emits the latest. For example, if we use it on valueChanges observable in the above example, next value is emitted only after given milliseconds. Only the latest is emitted. That is, as user is typing text, if we set debounce to 500 milliseconds, newer text is returned (emitted) at 500 milliseconds interval (while user is typing). This reduces number of API calls to the server and makes the whole thing manageable. Consider following code and images


        this.results = ctrl.valueChanges

                    .debounceTime(500)
                    .switchMap(fieldValue => this.http.get(`http://localhost:3001/api/search?term=${fieldValue}`))
                    .map(res => res.json());


Code Sample

For the complete code sample, follow the link

References

Sunday, June 26, 2016

Implementing HTTP Client in Angular 2 using Observables (RxJS) and Promises


Angular 2 provides a choice between Observables and Promises for developing a HTTP client that invokes server side API. This blog discusses the two options.


RxJS Introduction - Reactive Extensions (Rx) is a Microsoft backed open source project. It is an event driven, asynchronous design approach. It helps develop effectively for a stream of data returned through asynchronous and time consuming operations. The async operation could be network operations, UI interactions, file IO etc. There are Rx libraries available for galore of programming languages like C#, Python, JavaScript, Java so on. Follow this link for a complete list. As you might have guessed, RxJS is JavaScript library for Reactive Extensions.

Angular 2, RxJS and Promises- At first, let us look at Angular 2's usage of RxJS for making HTTP calls. Later in the blog, we will review promises.

HTTP calls are asynchronous in JavaScript. Earlier implementations of Angular (1.x) used promises. It has success and error callbacks that are invoked when the call is done.

Angular 2 provides a choice between RxJS and Promises. Observables support stream of data, where as promises are done once the current invocation is complete. And also, observables could be cancelled (or unsubscribed).

While RxJS 4 focussed on ES 5 implementation, RxJS 5 is a rewrite for ES 2015 (ES 6). For more details on RxJS 5, follow this link to GitHub Repo. It is in beta at the time of writing this blog.

Note: My previous blog discusses RxJS 4 in an Angular 1.x application. Follow the link to check-out the blog.

A Sample implementation - Just so that focus is on demonstrating HTTP client, will take a very simplistic code sample. It shows list of players (sports stars) on a page. The list is obtained from a node service (server side) over a HTTP GET call, on click of a button. Consider following image.


We will be implementing this using Angular 2 and TypeScript.

The code to retrieve players is encapsulated in playerService.ts Consider following code. Read through the comments for details on each line of code.

// Injectable decorator for allowing a class to be exported as service/provider.
import {Injectable} from '@angular/core';

// Http and Response for making HTTP calls
import {Http, Response} from '@angular/http';


// RxJS Observable

import {Observable} from 'rxjs/Observable'

// Get everything rxjs
import 'rxjs/Rx';

// Injectable decorator for allowing a class to be exported as service/provider.
@Injectable()
export class PlayerService {
   

    // inject Http instance for making HTTP calls.
    constructor(private http: Http){}


    getData(): Observable<Response> {
        return this.http.get('api/search');
    }
}


Consider the getData() function, it returns an observable of HTTP response. 

What is an obserable? It is an array or stream of data made available asynchronously. As the term indicates it is an object that could be observed for data to be made available. The observable emits data only when there is an observer. In other words, the observable could be subscribed to by an observer.

Consider following code. It is a function in an Angular 2 component. This component is bound to a UI template. The component subscribes to the observer on click of the button with caption "Get player list".

  getData(){
    this.serviceInstance
      .map(result => result.json())
      .subscribe( result => this.players = result);
  }


Following the link for the complete component class.

map is an RxJS operator for transforming the response to player list. The players array on the component is bound to the associated view/template. Refer to the following template code. ngFor iterates through players array. Bindings on JSON properties can be seen with-in the curly braces - {{}}.

    <div *ngFor="let item of players">
        <div>
            <strong>{{item.name}}</strong>
            <div><span>{{item.age}}</span> . <span>{{item.gender}}</span></div>
            <div>{{item.email}}</div>
            <div><hr></div>
        </div>
    </div>


Promises - Above functionality could be achieved using familiar promises as well. Observables are advisable for their sophistication. But if you prefer to stick to promises, API is available.

Promise too is asynchronous. After making a HTTP call. success or error callback are invoked with the response. Consider following code snippet in the service class (playerService.ts). It returns promise of HTTP response.

    getDataAsAPromise(): Promise<Response> {
        return this.http.get('api/search').toPromise(); // toPromise() is responsible for obtaining a promise from the get call.
    }


Consider following code. In the calling function, as the promise is resolved, one of the "then function callbacks" are invoked. First parameter is a success callback. Second parameter is an error callback. The success callback sets result on component's players array, which has bindings in the template. (refer to the template/HTML code in above section)

  getDataAsAPromise(){
    this.service.getDataAsAPromise().then( result => this.players = result.json(), error => console.log(error));
  }


Follow this link for complete code sample. "Read me" file has details to run the sample.


References

https://github.com/ReactiveX/rxjs
https://angular.io/docs/ts/latest/guide/server-communication.html#!#http-client
http://reactivex.io/languages.html
https://msdn.microsoft.com/en-in/data/gg577609.aspx